Here is the workaround:
1. Have a working Proxy profile e.g. "Home" in my configuration, and with all the rules.
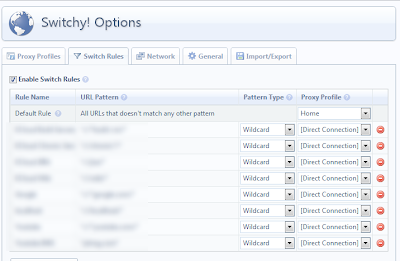
2. Enable Auto Switch Mode
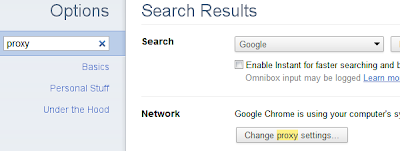
3. Open up Internet Options, the easiest way is to go through Chrome's options menu by searching "proxy" as the keyword, and click the "change proxy settings".
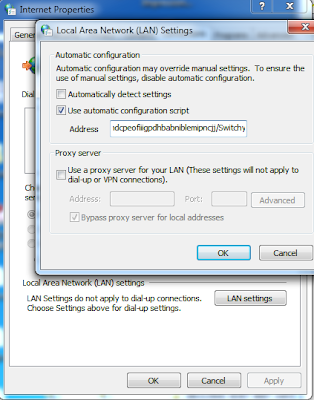
4. Click "LAN settings", don't worry about your checked boxes are not matching mine, the key is to copy the string inside the Address textbox into clipboard (select the text and press Ctrl+C). The string should be ended with "/SwitchyAuto.pacc?(numbers)".
5. Now go back to Switchy! Options and add a new Profile named "AutoProxy" (you can name it whatever you want). Select "Automatic Configuration" and paste the string copied from #3 into the "Auto Config URL". IMPORTANT: remove the "c?(numbers)" at the tail of the string to make it ended with "/SwitchyAuto.pac".
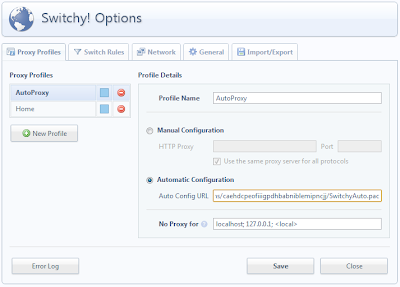
6. The last step is to activate (select) the AutoProxy profile. It should be working now.
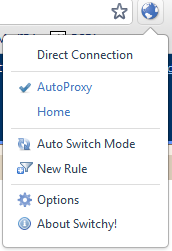
Important notes: If you change the rules, you need to activate the "Auto Switch Mode" and then, reselect the AutoProxy profile. The reason is that, by cycling through the Auto Switch Mode, the content in SwitchyAuto.pac will be updated with the new rules.
If I don't see your comments, please email me at kwong.matthew@gmail.com if you need help.
6 comments:
Thanks
It worked, thanks!
worked for me too. annoying though. i hope google/proxyswitchy react fast.
worked like a charm, thanks!
That helped a lot ! Thanks
euh yes thanks for Chrome Proxy
Post a Comment